- ater.dry
- ater.web
- Overview
- Quick Start
- 常见问题
- 教程
- 约定和规范
- 示例
- 自定义
- 高级
Create and run project
Create solutions
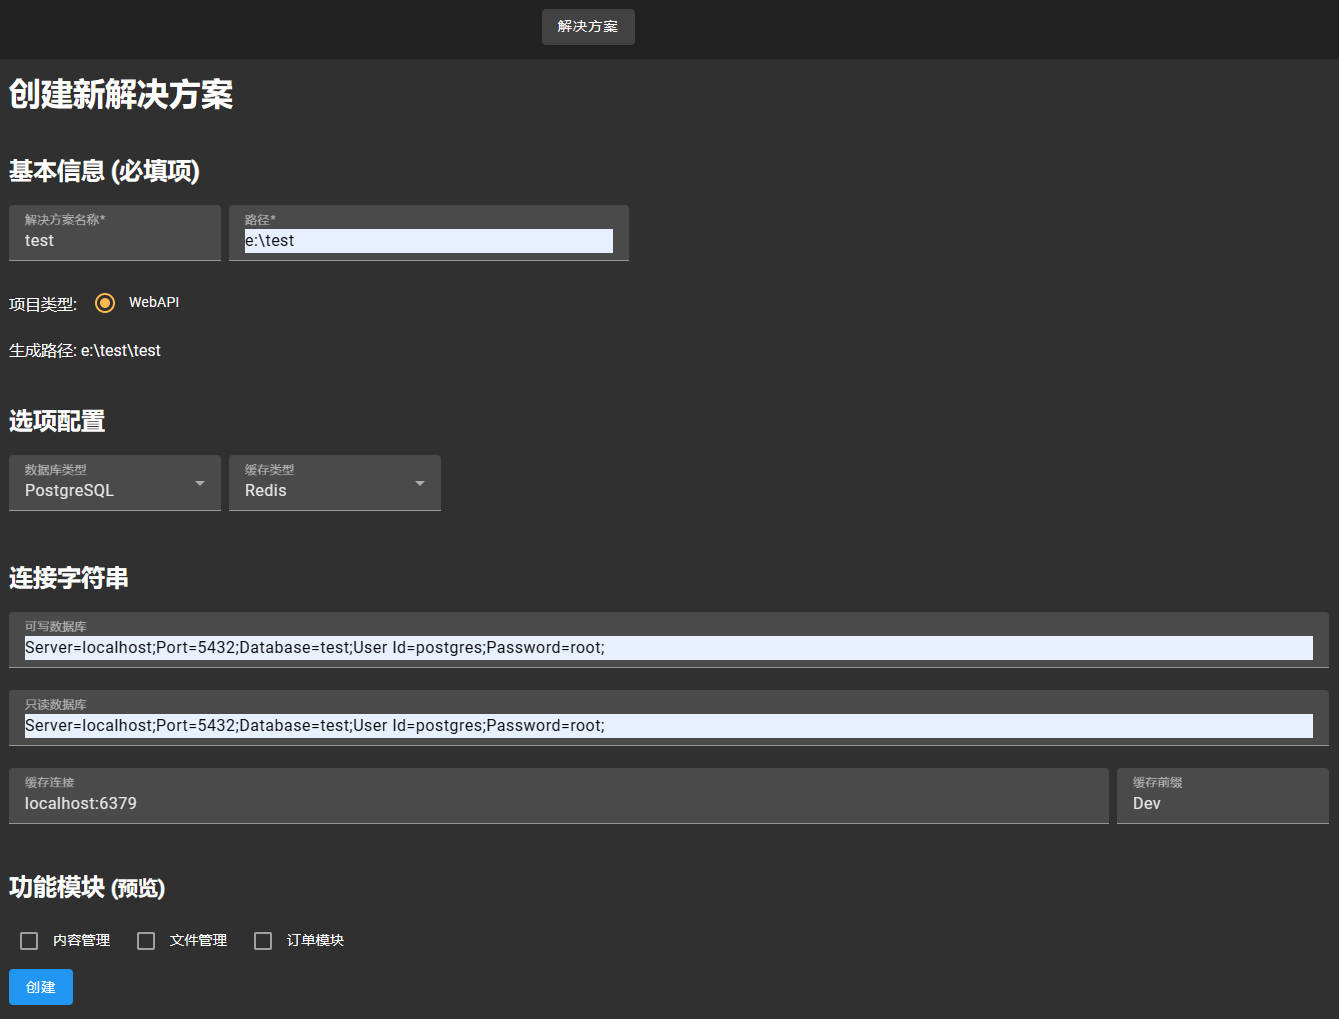
Click the Create button to go to the solution creation page.

You will see the following page, please fill in the solution name and local path, then click Create.
Run the solution
Now open the solution using your favorite IDE, or click the Open button directly in Studio.
Configuration
Please check the configuration file contents first, including:
- Configure database connection strings. Please configure the relevant connection strings in
ConnectionStringsinappsettings.jsonunderHttp.APIproject. Cacheconfiguration ofComponentsin configuration file, optional "Redis" or "Memory".
You can refer to the following configuration instructions:
"ConnectionStrings": {
    // 可写数据库
    "CommandDb": "Server=localhost;Port=5432;Database=MyProjectName;User Id=postgres;Password=root;",
    // 只读数据库
    "QueryDb": "Server=localhost;Port=5432;Database=MyProjectName;User Id=postgres;Password=root;",
    // 缓存连接
    "Cache": "localhost:6379",
    // 缓存前缀
    "CacheInstanceName": "Dev",
    // 日志接收地址
    "Logging": "http://localhost:4317"
  },
  "Components": {
    //Memory/Redis
    "Cache": "Memory"
  },
  // 邮件发送服务
  "Smtp": {
    // smtp服务地址
    "Host": "",
    "Port": 25,
    // 发件人名称
    "DisplayName": "",
    // 发件人地址
    "From": "",
    // 验证用户名
    "Username": "",
    // 验证密码
    "Password": "",
    "EnableSsl": true
  },
  "Key": {
    // 默认用户密码
    "DefaultPassword": "Hello.Net"
  },
Database migration
The template uses PostgreSQL by default. If you use another database provider, you can find the method for injecting database services in Application project AppServiceCollectionExtensions.cs
Please use dotnet ef command to generate migration code under Http.API project. Or run EFMigrations.ps1 script directly, such as:
.\EFMigrations.ps1 Init
Run the project
Run Http.API project directly, which opens the Swagger UI of the interface in the browser.
Note
When the interface program runs, it automatically commits migration and creates default users. If you want to change this behavior, modify the code in InitDataTask.cs